Monday, February 27, 2012

Random Thoughts on a Rainy Day


Random goat butts picture from when we visited Harley Farms in Pescadero

I don't have any big news for you today. The exact opposite. I feel like I've done so much this week and really I kind of have, but a lot of my week has been about patience. That's exactly what my daughter's fortune cookie from lunch said today: "Be patient! The Great Wall didn't got build in one day." Fortune cookies aren't much for grammar (and the saying is originally about Rome), but it was still true.

We are still waiting for Dandelion's litter of baby kits. Nothing. The average litter is born on day 31 but can go until day 35. Today is day 32 for Dandelion. It makes me wonder if she's even pregnant. I hope she is... I've been waiting 32 days for goodness sake. It may be a case of 'a watched pot never boils' because we have been checking on her twice as much as usual. Hopefully she's just holding out for when no one is looking. Either way she is a fantastic nest builder.

I went shopping with my mom today and got a book on clearance that is just about making French macarons. I'm ecstatic! Now I just have to buy that $13 bag of almond meal to test out a couple macaron recipes. French macarons may be a little too pretentious for a farm (especially a German named farm), but I don't mind.

I also registered our Rabbitry with the American Rabbit Breeders Association, ARBA, today. As well as reserving the name "Frühlingskabine Rabbitry" --fancy 'u' and all-- I also became a member and bought a year long breeders listing on their site. For anyone unfamiliar with rabbityness, ARBA is the bigwig of the rabbit world and sponsors many rabbit shows. Look them up here! Check back in a few weeks and hopefully our listing will be there under French Angoras.

Other than those little bits of life it has been pretty boring around here. I blame the rain/brief snow. But be patient like the fortune cookie. It will be spring and then summer soon enough and then we can talk all manners of garden, and growing, and bees, and chicken antics, and baby bunnies. Soon enough my friends.

Thursday, February 23, 2012

Garden Status :: prepared

The long awaited preparation of soil. We've been "beefing up" our half of the garden all winter by adding compost, adding nitrogen-rich rabbit manure, adding some decomposing leaves, and finally.... rote-tilling it all in.

We are trying a "square foot garden" this year to try to optimize space. I marked out our 4x4' beds with wooden stakes.


I drilled holes through the top of each stake so I could run jute through them, more obviously marking beds and paths.


See? Easy peasy. Then I hammered them in the soil really well.


Marked and ready to plant seeds in two weeks. Even with the deceivingly warm weather today, March always brings unexpected snow. We'll see if that stands true for this year as well.


This is a view of the rear fence corner. We will be trellising the Amish pie pumpkins, butternut squash, Amish paste tomatoes, and Golden Honey Moon melons (at different seasons) on this fence. Use what you've got right?!


Here is my layout for the garden. The garden gate would be in the bottom left corner of the garden plan and is the position from which I took all of these pictures.
The paprika peppers and garlic will take up the whole bed they are marked in, but are planted in opposite seasons. The blue circles are potted blueberry bushes that we are attempting to bring back.

Monday, February 20, 2012

Nest Box for Dandelion

My comic

In this video post, little Cami and I prepare a nest box for our French angora doe, Dandelion. If she is pregnant, she will deliver her babies within the next five to ten days.


Sunday, February 19, 2012

DIY Rabbit Cage Rack :: tutorial

I waited months to put together a rack to hold rabbit cages and dropping pans stacked one on top of the other. If you've ever looked at rabbit cages (not the small pet cages), you would know that there are generally two types. The kind where the wire sides some down to form legs and the dropping pan can slide in and out like "drawer". And the kind that has no such drawer function and you're left wondering how the hell to balance a wire cube on top of a pan with 3" tall sides. All of the 30"x36" wire cages I saw that were big enough for my breed were of that second type.

Now, what do you do with a cage and a pan with no apparent method of putting them together? You could buy a stacking leg kit with a pan holder for $25 each. Or you could get crazy with some PVC pipe. I chose the latter.


These two racks are each capable of holding three cages and dropping pans giving me space for six cages now!

Here is how you can make your own:
**The following measurements are for "Pet Lodge" brand 30"x36" wire rabbit cages and the corresponding dropping pan. I have in no way been paid or otherwise compensated for using or writing about this brand... but that would be great wouldn't it?**


First collect your supplies:
You may need to cut the PVC to the appropriate lengths listed. All PVC pipe used in this project is 3/4 inch size. This tutorial is to build ONE rack that holds THREE cages. In the pictures I built two of these.
(Number Needed) Description --Part Label
(2) 20 3/4" PVC lengths --stableizers
(4) 11" PVC lengths --tops
(8) 21" PVC lengths --verticals
(6) 37" PVC lengths --horizontals
(4) 6" PVC lengths --legs
(12) 'T' PVC connectors
(4) Elbow PVC connectors
(6) 24" lengths of aluminum or steel 'L' angled metal; preferably with pre-drilled holes
(12) 1/4" threaded bolts, 2" long
(12) metal washers
(12) locking nuts for threaded bolts
(2 oz.) PVC pipe glue/cement


Assemble and glue (4) lengths: 21" vertical, 'T' connector, 6" leg.


Add to the top of that and glue in place: 'T' connector, 21" vertical. Be sure all of your 'T' connectors are facing the exact same direction and lined up.
(Not pictured): add to top of each pole a 'T' connector and 11" tops. Glue in place.


First measure that your 37" horizontals leave at least 36 1/4" between 21" verticals. This measurement may include the 'T' connector. Mark a line where the 'T' and the PVC meet so when you glue the horizontals into place, you are leaving enough space for the cage to fit in.
Glue 37" horizontals across and into both sides at the 'T' connectors. Repeat for second set. (Not pictured): don't forget that third set of 'T' connectors and 11" tops connected to the top from the last step. You should have (3) horizontals glued in place now for each set of legs.


Measure 3" from the bottom of each 'T' connector and mark a visible line. This should be a little more than the height of your dropping pan. Hold the metal angle so that the corner of the 'L' shape is just above your line. Mark a dot through one of the holes in your metal angle so that it is in the exact inside of the PVC pipe. Drill a hole all of the way through with a 5/16 drill bit. This is one bit bigger than your 1/4" bolts and they should pass through fine.


If you bought a long length of metal angle and then cut it into pieces you may end up with a cut hole at one of your ends like this. It's okay, truck on. Just use the next closest complete hole. Attach the metal angle from one set of legs to the other using a bolt, washer, and locking nut on each side of the metal angle. These metal angles will be holding your dropping pan allowing it to slide out for easy cleaning.


Repeat connecting the metal angle from one set of legs to the other set using bolt, washer, nut for the remaining (5) metal angles. The rack should look like this so far. A total of (6) metal angles connecting the two sets of legs from under the 'T' connectors.
Your sequence of parts should go like this from top to bottom: 11" tops, 'T' connector to 37" horizontal, metal angle attached to 21" vertical, 'T' connector to 37" horizontal, metal angle attached to 21" vertical, 'T' connector to 37" horizontal, metal angle attached to 6" leg.


Last, but not least, glue PVC elbows onto the top pieces facing each other as pictured. Glue one side of the 20 3/4" stabilizer piece into each PVC elbow parallel to the metal angles.


Two finished racks side by side. Now just insert cages, dropping pans, and... Rabbits!

Friday, February 17, 2012

Honesty in Building

My comic

I always try my best to be as honest as possible when sharing our projects around the farm with you. Especially when it comes to how much something will cost. Mostly because that's what I like to know first before I start a project.

This is all leading to the fact that we just got back from Orchard Supply Hardware store with the materials to (finally) build the stacking rack for the rabbit cages. We picked up enough materials to build two racks that hold three cages giving us enough room to comfortably house six rabbit cages.


Let me tell you now... It cost $95 dollars. Jeez! I know! Way more than I wanted to spend on cage racks, but still about $60 less than buying the kits. Worth it? I'll know tomorrow when I assemble them. I do know, however, that my cage racks will be much sturdier than the manufacturer's kits which is important to me and my large breed rabbits.

It shows in my rudimentary drawing that the legs will be 10" off the ground. I have since changed my mind into making them more like 6" so that the top cage won't be much higher than 5' tall (since I am not much taller than 5' myself).

I also wanted to share some picture updates of the rabbits. Their wool coats are really coming in now! I may wait another month to shear them because I want to wait and see how well they will shed their coat on their own.


Thistle, Ruby-eyed White buck(male)


Clementine, Chocolate Tortoiseshell doe(female)


Dandelion, potentially pregnant Fawn-colored doe(female)

You can't really tell because he's all one color, but Thistle has the longest coat. Dandelion is a month older than Clementine so her coat is a little longer than Clementine's also. Dandelion is quite the model isn't she?

- Sarah

Tuesday, February 14, 2012

Seeds Officially Ordered!

As of ten minutes ago, I officially ordered seeds for the garden from Baker Creek Heirloom Seeds. Not all of these will be planted in the spring because I ordered seeds for the whole year. It all came to $50.25 including shipping. That is my kind of price! All of these are heirloom, open-pollinated, non-GMO seeds and cost much less than other companies for the exact same thing. Here's what is in the mail:


Calabrese Green Sprouting Broccoli


He Shi Ko Bunching Onion


Leutschauer Paprika Pepper


Amish Paste Tomato


Cilantro, Slo-Bolt


Bloomsdale Long Standing Spinach


Early Wonder Beet


Detroit Dark Red Beet


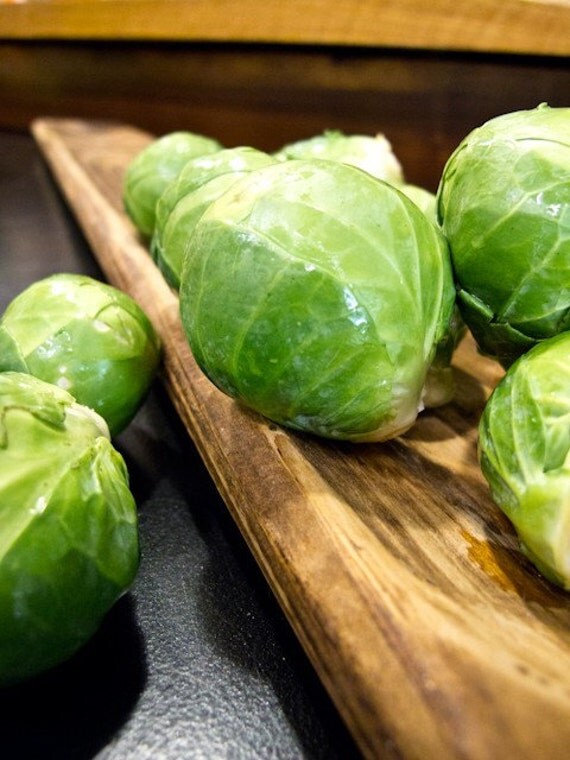
Long Island Improved Brussels Sprouts


Mammoth Red Rock Cabbage


Danvers 126 Half Long Carrot


Parisienne Carrot


Butternut Waltham Squash


Amish Pie Pumpkin


Contender (Buff) Valentine Bush Bean


West India Burr Gherkins Cucumber


Rosa Bianca Eggplant


Quinoa grain, Brightest Brilliant


Giant Musselburgh Leek


Golden Honeymoon Melon


Australian Brown Onion


Flamingo Pink Chard


- Sarah

Monday, February 13, 2012

The Nudist Annex

So, as you know, we have resurrected the original chicken coop. When our family first got chickens we bought a large doghouse with insulated walls and converted it into a "chicken coop" by adding a roost and two nest boxes on the back. After two of our four little Barred Rock chicks were brutally murdered by a neighbor's house cat we decided to up the security and build the existing "Deluxe Chicken Ark". The little doghouse/coop was retired.

But since the arrival of our new Naked Neck Turkens we have found a new need for it. As a nudist annex. The Turkens were getting beat-up and there wasn't any sign of that stopping so we decided to create a safe haven for them.

There was no way we were about to build a whole new coop and run for just two chickens, no matter how stinkin' cute. So we dug out the old doghouse/coop...


...cut a hole in the existing run, used some scrap chicken wire and secured a tunnel from the run to the front of the little coop...


...sectioned off a small piece of the run with some fencing and tent stakes...


...and inserted the Turkens, Molter and Scully. Their little coop is the perfect size for the two of them and has a cute drawbridge door that acts as a ramp into their part of the outdoor run.


I checked on them a few times today, since it has been raining, and everything is dry and warm. Success!